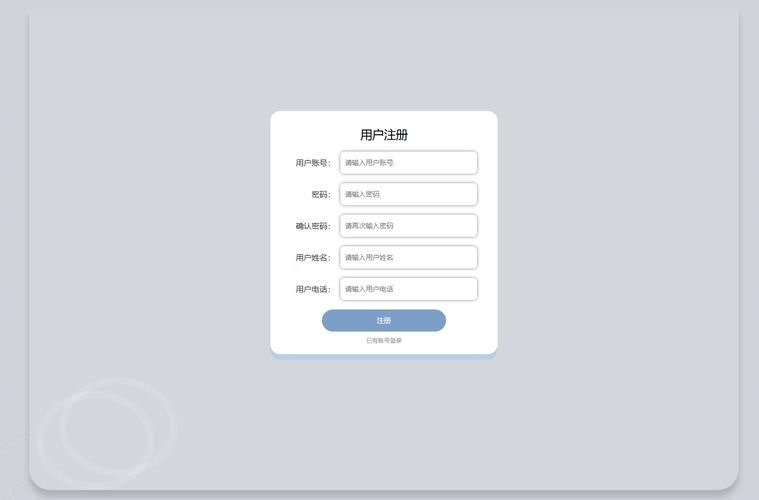
- 完整的表单结构:用户名、邮箱、密码、确认密码、头像上传。
- 现代化的 CSS 样式:使用了 Flexbox 布局,使表单居中且美观。
- 图片预览功能:用户选择图片后,可以立即在页面上预览,而不是直接上传到服务器。
- 基本的 JavaScript 交互:
- 处理图片上传和预览。
- 实时验证密码是否匹配。
- 表单提交前的基本验证。
- 用户友好的反馈:使用提示信息(
<span>)代替alert弹窗,体验更好。
最终效果预览
完整 HTML 代码
您可以直接将以下代码复制到一个 .html 文件中,然后用浏览器打开即可看到效果。
(图片来源网络,侵删)
<!DOCTYPE html>
<html lang="zh-CN">
<head>
    <meta charset="UTF-8">
    <meta name="viewport" content="width=device-width, initial-scale=1.0">用户注册</title>
    <style>
        /* --- 全局和基础样式 --- */
        * {
            box-sizing: border-box;
            margin: 0;
            padding: 0;
        }
        body {
            font-family: -apple-system, BlinkMacSystemFont, 'Segoe UI', Roboto, 'Helvetica Neue', Arial, sans-serif;
            background-color: #f0f2f5;
            color: #333;
            display: flex;
            justify-content: center;
            align-items: center;
            min-height: 100vh;
            padding: 20px;
        }
        /* --- 注册表单容器 --- */
        .registration-container {
            background-color: #ffffff;
            padding: 40px;
            border-radius: 10px;
            box-shadow: 0 4px 12px rgba(0, 0, 0, 0.1);
            width: 100%;
            max-width: 450px;
        }
        h1 {
            text-align: center;
            color: #1a1a1a;
            margin-bottom: 30px;
            font-size: 28px;
        }
        /* --- 表单组样式 --- */
        .form-group {
            margin-bottom: 20px;
        }
        label {
            display: block;
            margin-bottom: 8px;
            font-weight: 500;
            color: #555;
        }
        input[type="text"],
        input[type="email"],
        input[type="password"] {
            width: 100%;
            padding: 12px 15px;
            border: 1px solid #ddd;
            border-radius: 6px;
            font-size: 16px;
            transition: border-color 0.3s, box-shadow 0.3s;
        }
        input[type="text"]:focus,
        input[type="email"]:focus,
        input[type="password"]:focus {
            outline: none;
            border-color: #007bff;
            box-shadow: 0 0 0 3px rgba(0, 123, 255, 0.25);
        }
        /* --- 错误/成功信息样式 --- */
        .error-message {
            color: #dc3545;
            font-size: 14px;
            margin-top: 5px;
            display: none;
        }
        .success-message {
            color: #28a745;
            font-size: 14px;
            margin-top: 5px;
            display: none;
        }
        /* --- 图片上传区域样式 --- */
        .image-upload-area {
            border: 2px dashed #ccc;
            border-radius: 8px;
            padding: 20px;
            text-align: center;
            cursor: pointer;
            transition: border-color 0.3s, background-color 0.3s;
            position: relative;
        }
        .image-upload-area:hover {
            border-color: #007bff;
            background-color: #f8f9fa;
        }
        .image-upload-area.has-image {
            border-style: solid;
            border-color: #28a745;
            padding: 0;
        }
        #avatar-input {
            display: none; /* 隐藏原生输入框 */
        }
        .upload-prompt {
            color: #6c757d;
        }
        #avatar-preview {
            max-width: 150px;
            max-height: 150px;
            border-radius: 50%;
            display: none; /* 初始隐藏 */
        }
        .image-upload-area.has-image .upload-prompt {
            display: none;
        }
        .image-upload-area.has-image #avatar-preview {
            display: block;
        }
        /* --- 提交按钮样式 --- */
        .submit-btn {
            width: 100%;
            padding: 14px;
            background-color: #007bff;
            color: white;
            border: none;
            border-radius: 6px;
            font-size: 18px;
            font-weight: bold;
            cursor: pointer;
            transition: background-color 0.3s, transform 0.1s;
        }
        .submit-btn:hover {
            background-color: #0056b3;
        }
        .submit-btn:active {
            transform: scale(0.98);
        }
        .submit-btn:disabled {
            background-color: #a0c3ff;
            cursor: not-allowed;
        }
    </style>
</head>
<body>
    <div class="registration-container">
        <h1>创建新账户</h1>
        <form id="registration-form" novalidate>
            <!-- 头像上传 -->
            <div class="form-group">
                <label for="avatar-input">个人头像</label>
                <div class="image-upload-area" id="image-upload-area">
                    <img id="avatar-preview" src="" alt="头像预览">
                    <p class="upload-prompt">点击或拖拽图片到此处上传</p>
                    <input type="file" id="avatar-input" accept="image/*">
                </div>
            </div>
            <!-- 用户名 -->
            <div class="form-group">
                <label for="username">用户名</label>
                <input type="text" id="username" name="username" placeholder="请输入用户名" required>
                <span class="error-message" id="username-error"></span>
            </div>
            <!-- 邮箱 -->
            <div class="form-group">
                <label for="email">电子邮箱</label>
                <input type="email" id="email" name="email" placeholder="请输入邮箱地址" required>
                <span class="error-message" id="email-error"></span>
            </div>
            <!-- 密码 -->
            <div class="form-group">
                <label for="password">密码</label>
                <input type="password" id="password" name="password" placeholder="请输入密码" required>
                <span class="error-message" id="password-error"></span>
            </div>
            <!-- 确认密码 -->
            <div class="form-group">
                <label for="confirm-password">确认密码</label>
                <input type="password" id="confirm-password" name="confirm-password" placeholder="请再次输入密码" required>
                <span class="error-message" id="confirm-password-error"></span>
                <span class="success-message" id="password-match-success">密码匹配!</span>
            </div>
            <!-- 提交按钮 -->
            <button type="submit" class="submit-btn">立即注册</button>
        </form>
    </div>
    <script>
        document.addEventListener('DOMContentLoaded', function () {
            const form = document.getElementById('registration-form');
            const avatarInput = document.getElementById('avatar-input');
            const imageUploadArea = document.getElementById('image-upload-area');
            const avatarPreview = document.getElementById('avatar-preview');
            const passwordInput = document.getElementById('password');
            const confirmPasswordInput = document.getElementById('confirm-password');
            const passwordMatchSuccess = document.getElementById('password-match-success');
            // --- 图片上传和预览逻辑 ---
            imageUploadArea.addEventListener('click', () => {
                avatarInput.click();
            });
            avatarInput.addEventListener('change', function (e) {
                const file = e.target.files[0];
                if (file) {
                    const reader = new FileReader();
                    reader.onload = function (e) {
                        avatarPreview.src = e.target.result;
                        imageUploadArea.classList.add('has-image');
                    };
                    reader.readAsDataURL(file);
                }
            });
            // --- 密码匹配验证 ---
            function checkPasswordMatch() {
                const password = passwordInput.value;
                const confirmPassword = confirmPasswordInput.value;
                if (confirmPassword.length > 0) {
                    if (password === confirmPassword) {
                        passwordMatchSuccess.style.display = 'block';
                        confirmPasswordInput.setCustomValidity('');
                    } else {
                        passwordMatchSuccess.style.display = 'none';
                        confirmPasswordInput.setCustomValidity('密码不匹配');
                    }
                } else {
                    passwordMatchSuccess.style.display = 'none';
                    confirmPasswordInput.setCustomValidity('');
                }
            }
            passwordInput.addEventListener('input', checkPasswordMatch);
            confirmPasswordInput.addEventListener('input', checkPasswordMatch);
            // --- 表单提交逻辑 ---
            form.addEventListener('submit', function (e) {
                e.preventDefault(); // 阻止默认的表单提交行为
                // 在这里可以添加更复杂的验证逻辑
                // 检查用户名长度、邮箱格式、密码强度等
                // 清除之前的错误信息
                document.querySelectorAll('.error-message').forEach(el => el.textContent = '');
                document.querySelectorAll('.form-group input').forEach(el => el.style.borderColor = '#ddd');
                let isValid = true;
                // 简单的客户端验证示例
                if (passwordInput.value !== confirmPasswordInput.value) {
                    document.getElementById('confirm-password-error').textContent = '两次输入的密码不一致';
                    confirmPasswordInput.style.borderColor = '#dc3545';
                    isValid = false;
                }
                if (passwordInput.value.length < 6) {
                    document.getElementById('password-error').textContent = '密码长度不能少于6位';
                    passwordInput.style.borderColor = '#dc3545';
                    isValid = false;
                }
                // 模拟提交过程
                const submitBtn = form.querySelector('.submit-btn');
                submitBtn.disabled = true;
                submitBtn.textContent = '注册中...';
                // 模拟网络请求延迟
                setTimeout(() => {
                    if (isValid) {
                        // 在实际应用中,这里会使用 fetch 或 XMLHttpRequest 发送数据到服务器
                        alert('注册成功!'); // 用户友好的成功提示
                        form.reset(); // 重置表单
                        imageUploadArea.classList.remove('has-image');
                        avatarPreview.src = '';
                        passwordMatchSuccess.style.display = 'none';
                    }
                    // 恢复按钮状态
                    submitBtn.disabled = false;
                    submitBtn.textContent = '立即注册';
                }, 1500);
            });
        });
    </script>
</body>
</html>
代码分步解析
HTML 结构 (<body>)
<div class="registration-container">: 整个注册卡片的容器,用于居中和设置样式。<form id="registration-form" novalidate>: 表单元素。id="registration-form": 供 JavaScript 查找和操作。novalidate: 这是一个重要属性,它告诉浏览器不要使用其默认的 HTML5 验证,这样我们就可以完全用 JavaScript 来控制验证逻辑和错误提示的显示方式,提供更统一的用户体验。
- 头像上传区域:
<div class="image-upload-area">: 这是一个自定义的上传区域,比原生的<input type="file">更美观。<input type="file" id="avatar-input" accept="image/*" style="display: none;">: 真正的文件输入框,但我们通过 CSS 将它隐藏起来。accept="image/*"限制了用户只能选择图片文件。<img id="avatar-preview">: 用于显示用户选择的图片。<p class="upload-prompt">: 给用户的提示文字。
- 输入字段: 每个输入字段(用户名、邮箱、密码等)都包裹在一个
<div class="form-group">中,方便布局和添加错误信息。 <span class="error-message">: 用于显示该字段的验证错误信息,初始状态为display: none。<button type="submit">: 提交按钮。
CSS 样式 (<style>)
- 全局样式: 使用
box-sizing: border-box让元素的padding和border不会影响其总宽度。 - 居中布局:
body使用display: flex和justify-content/align-items: center实现了完美的垂直水平居中。 - 表单样式: 为输入框添加了
padding、border和focus状态样式,提升交互体验。 - 图片上传区域:
- 使用
border: 2px dashed创建了一个虚线边框,看起来像一个可拖放的区域。 .has-image类在选择了图片后被添加,用来改变边框样式(变为实线)并隐藏提示文字,显示预览图。
- 使用
- 按钮样式: 添加了
hover和active伪类,让按钮有更好的交互反馈。
JavaScript 交互 (<script>)
- 图片预览:
- 当用户点击上传区域时,触发隐藏的
<input type="file">的点击事件。 - 当用户选择了文件后,
FileReaderAPI 读取文件内容。 readAsDataURL方法将文件读取为一个 Data URL(一个 Base64 编码的字符串),这个字符串可以直接作为<img>标签的src属性值。- 将预览图显示出来,并给上传区域添加
.has-image类来更新样式。
- 当用户点击上传区域时,触发隐藏的
- 密码匹配验证:
checkPasswordMatch()函数比较password和confirm-password两个输入框的值。- 如果匹配,显示绿色的成功提示;如果不匹配,设置
input的setCustomValidity属性(这会阻止表单提交)并隐藏成功提示。 - 监听两个密码输入框的
input事件,实现实时验证。
- 表单提交处理:
- 监听
form的submit事件,并使用e.preventDefault()阻止默认的页面刷新提交行为。 - 进行客户端验证(检查密码长度和匹配度)。
- 如果验证失败,显示相应的错误信息,并将对应输入框的边框变红。
- 如果验证通过,模拟一个异步的注册过程(使用
setTimeout)。 - 在模拟过程中,禁用提交按钮并更改其文字,以告知用户“正在处理”。
- 模拟完成后,弹出
alert提示成功,并重置表单。
- 监听
这个例子提供了一个非常实用的起点,你可以根据实际需求(连接后端 API、添加更复杂的验证规则等)进行进一步的修改和扩展。
(图片来源网络,侵删)


