这个“完整”的购物网页将包含以下核心功能:
(图片来源网络,侵删)
- 商品展示:在首页列出所有商品。
- 商品详情:点击某个商品可以查看详细信息。
- 购物车:可以添加商品到购物车,查看购物车中的商品,并能修改数量或删除。
- 结账流程:一个简单的结账页面(为了简化,我们不会真的做支付,只模拟流程)。
我们将使用最经典和易于理解的技术栈:
- 后端框架:Servlet + JSP + JDBC,这是 Java Web 开发的基础,非常适合学习和理解原理。
- 前端:基础的 HTML, CSS, JavaScript。
- 数据库:H2 Database,这是一个轻量级的、基于文件的数据库,无需安装和配置,非常适合项目开发和测试。
- 项目管理:Maven,Eclipse 内置了对 Maven 的良好支持,可以方便地管理项目依赖和构建。
第零步:准备工作
-
安装 Eclipse IDE:
- 前往 Eclipse 官网 下载 "Eclipse IDE for Enterprise Java and Web Developers" 版本,这个版本包含了开发 Web 应用所需的所有工具。
- 下载并解压到你的电脑上。
-
安装数据库驱动:
- 我们需要一个 Java 驱动来连接数据库,下载 H2 数据库的 JDBC 驱动 JAR 文件:H2 Database Engine (下载
h2-x.x.xx.jar即可)。 - 将下载的
h2-x.x.xx.jar文件复制到 Eclipse 安装目录下的plugins文件夹中,这一步是为了让 Eclipse 自带的 H2 控制台能够识别驱动。
- 我们需要一个 Java 驱动来连接数据库,下载 H2 数据库的 JDBC 驱动 JAR 文件:H2 Database Engine (下载
第一步:创建 Maven Web 项目
-
打开 Eclipse,点击
File->New->Maven Project。 (图片来源网络,侵删)
 -
勾选 "Create a simple project (skip archetype selection)",然后点击
Next。 -
填写项目信息:
- Group Id:
com.example - Artifact Id:
shopping-web - Packaging:
war(Web Application Archive)
- Group Id:
-
点击
Finish,Eclipse 会为你创建一个标准的 Maven Web 项目结构。 -
配置项目:
 (图片来源网络,侵删)
- 在项目根目录
pom.xml文件中,添加Servlet API和JSTL (JSP Standard Tag Library)的依赖,JSTL 可以让 JSP 代码更简洁。
<project xmlns="http://maven.apache.org/POM/4.0.0" ...> ... <dependencies> <!-- Servlet API --> <dependency> <groupId>javax.servlet</groupId> <artifactId>javax.servlet-api</artifactId> <version>4.0.1</version> <scope>provided</scope> </dependency> <!-- JSP API --> <dependency> <groupId>javax.servlet.jsp</groupId> <artifactId>javax.servlet.jsp-api</artifactId> <version>2.3.3</version> <scope>provided</scope> </dependency> <!-- JSTL (JSP Standard Tag Library) --> <dependency> <groupId>javax.servlet</groupId> <artifactId>jstl</artifactId> <version>1.2</version> </dependency> </dependencies> ... </project> - 在项目根目录
-
配置项目部署描述符 (web.xml):
- 在
src/main/webapp/WEB-INF/目录下,找到web.xml文件,如果没有,可以手动创建一个。 - 这个文件是 Web 应用的配置中心,用于定义 Servlet 等信息。
<?xml version="1.0" encoding="UTF-8"?> <web-app xmlns="http://xmlns.jcp.org/xml/ns/javaee" xmlns:xsi="http://www.w3.org/2001/XMLSchema-instance" xsi:schemaLocation="http://xmlns.jcp.org/xml/ns/javaee http://xmlns.jcp.org/xml/ns/javaee/web-app_4_0.xsd" version="4.0"> <display-name>Shopping Web App</display-name> <!-- 欢迎页面,访问根路径时默认跳转到 index.jsp --> <welcome-file-list> <welcome-file>index.jsp</welcome-file> </welcome-file-list> </web-app> - 在
第二步:创建数据库和商品数据
-
启动 H2 控制台:
- 在 Eclipse 中,点击
Window->Show View->Other...。 - 在弹出的窗口中,展开
Database,选择H2 DB-Console,然后点击OK。 - 在右下角的 "H2 DB Console" 视图中,点击
Add...。 - Settings -> Generic`
- Driver Class:
org.h2.Driver - JDBC URL:
jdbc:h2:~/shopping_db(这会在你的用户主目录下创建一个名为shopping_db.mv.db的文件作为数据库) - User Name:
sa - Password: (留空)
- 点击
OK,然后双击刚刚添加的连接jdbc:h2:~/shopping_db来打开控制台。
- 在 Eclipse 中,点击
-
创建表并插入数据:
- 在控制台的 SQL 执行窗口中,输入以下 SQL 语句并点击执行。
-- 创建商品表
CREATE TABLE products (
    id INT PRIMARY KEY AUTO_INCREMENT,
    name VARCHAR(255) NOT NULL,
    price DECIMAL(10, 2) NOT NULL,
    description TEXT,
    image_url VARCHAR(255)
);
-- 插入一些示例商品数据
INSERT INTO products (name, price, description, image_url) VALUES
('苹果 iPhone 15', '5999.00', '最新款苹果手机,性能强劲。', 'https://via.placeholder.com/300x200?text=iPhone+15'),
('华为 MatePad Pro', '3999.00', '华为高端平板,办公娱乐两不误。', 'https://via.placeholder.com/300x200?text=MatePad+Pro'),
('小米智能手环 8', '249.00', '健康监测,运动追踪,性价比之王。', 'https://via.placeholder.com/300x200?text=Mi+Band+8'),
('戴森 V15 无绳吸尘器', '4990.00', '强劲吸力,智能感应,让清洁更轻松。', 'https://via.placeholder.com/300x200?text=Dyson+V15');
第三步:编写后端代码 (Java Servlet)
在 src/main/java 目录下,按照包结构创建 Java 类。
-
Product.java(商品实体类)package com.example.model; public class Product { private int id; private String name; private double price; private String description; private String imageUrl; // 构造器、Getter 和 Setter 方法 public Product() {} public Product(int id, String name, double price, String description, String imageUrl) { this.id = id; this.name = name; this.price = price; this.description = description; this.imageUrl = imageUrl; } // 省略其他 getter 和 setter... public int getId() { return id; } public void setId(int id) { this.id = id; } public String getName() { return name; } public void setName(String name) { this.name = name; } public double getPrice() { return price; } public void setPrice(double price) { this.price = price; } public String getDescription() { return description; } public void setDescription(String description) { this.description = description; } public String getImageUrl() { return imageUrl; } public void setImageUrl(String imageUrl) { this.imageUrl = imageUrl; } } -
ProductDAO.java(数据访问对象):负责与数据库交互。package com.example.dao; import com.example.model.Product; import java.sql.*; import java.util.ArrayList; import java.util.List; public class ProductDAO { private static final String DB_URL = "jdbc:h2:~/shopping_db"; private static final String DB_USER = "sa"; private static final String DB_PASSWORD = ""; public List<Product> getAllProducts() { List<Product> products = new ArrayList<>(); String sql = "SELECT * FROM products"; try (Connection conn = DriverManager.getConnection(DB_URL, DB_USER, DB_PASSWORD); Statement stmt = conn.createStatement(); ResultSet rs = stmt.executeQuery(sql)) { while (rs.next()) { Product product = new Product(); product.setId(rs.getInt("id")); product.setName(rs.getString("name")); product.setPrice(rs.getDouble("price")); product.setDescription(rs.getString("description")); product.setImageUrl(rs.getString("image_url")); products.add(product); } } catch (SQLException e) { e.printStackTrace(); } return products; } public Product getProductById(int id) { String sql = "SELECT * FROM products WHERE id = ?"; try (Connection conn = DriverManager.getConnection(DB_URL, DB_USER, DB_PASSWORD); PreparedStatement pstmt = conn.prepareStatement(sql)) { pstmt.setInt(1, id); ResultSet rs = pstmt.executeQuery(); if (rs.next()) { Product product = new Product(); product.setId(rs.getInt("id")); product.setName(rs.getString("name")); product.setPrice(rs.getDouble("price")); product.setDescription(rs.getString("description")); product.setImageUrl(rs.getString("image_url")); return product; } } catch (SQLException e) { e.printStackTrace(); } return null; } } -
ProductServlet.java:处理商品相关的请求。package com.example.servlet; import com.example.dao.ProductDAO; import com.example.model.Product; import javax.servlet.ServletException; import javax.servlet.annotation.WebServlet; import javax.servlet.http.HttpServlet; import javax.servlet.http.HttpServletRequest; import javax.servlet.http.HttpServletResponse; import java.io.IOException; import java.util.List; @WebServlet("/products") public class ProductServlet extends HttpServlet { private static final long serialVersionUID = 1L; private ProductDAO productDAO; public void init() { productDAO = new ProductDAO(); } protected void doGet(HttpServletRequest request, HttpServletResponse response) throws ServletException, IOException { String action = request.getParameter("action"); if (action == null) { action = "list"; // 默认动作是列出所有商品 } switch (action) { case "list": listProducts(request, response); break; case "view": viewProduct(request, response); break; default: listProducts(request, response); break; } } private void listProducts(HttpServletRequest request, HttpServletResponse response) throws ServletException, IOException { List<Product> productList = productDAO.getAllProducts(); request.setAttribute("productList", productList); request.getRequestDispatcher("products.jsp").forward(request, response); } private void viewProduct(HttpServletRequest request, HttpServletResponse response) throws ServletException, IOException { int id = Integer.parseInt(request.getParameter("id")); Product product = productDAO.getProductById(id); request.setAttribute("product", product); request.getRequestDispatcher("product-detail.jsp").forward(request, response); } } -
CartServlet.java:处理购物车相关的请求。package com.example.servlet; import com.example.model.Product; import javax.servlet.ServletException; import javax.servlet.annotation.WebServlet; import javax.servlet.http.HttpServlet; import javax.servlet.http.HttpServletRequest; import javax.servlet.http.HttpServletResponse; import javax.servlet.http.HttpSession; import java.io.IOException; import java.util.ArrayList; import java.util.List; @WebServlet("/cart") public class CartServlet extends HttpServlet { private static final long serialVersionUID = 1L; protected void doGet(HttpServletRequest request, HttpServletResponse response) throws ServletException, IOException { String action = request.getParameter("action"); if (action == null) { action = "view"; // 默认动作是查看购物车 } switch (action) { case "add": addToCart(request, response); break; case "view": viewCart(request, response); break; case "remove": removeFromCart(request, response); break; default: viewCart(request, response); break; } } private void addToCart(HttpServletRequest request, HttpServletResponse response) throws IOException { int productId = Integer.parseInt(request.getParameter("id")); // 实际项目中,这里应该根据 productId 从数据库获取完整商品信息 // 为了简化,我们只创建一个最小化的商品对象 Product product = new Product(); product.setId(productId); product.setName("商品 " + productId); // 简化处理 product.setPrice(100.0 * productId); // 简化处理 HttpSession session = request.getSession(); List<Product> cart = (List<Product>) session.getAttribute("cart"); if (cart == null) { cart = new ArrayList<>(); session.setAttribute("cart", cart); } cart.add(product); response.sendRedirect(request.getContextPath() + "/cart?action=view"); } private void viewCart(HttpServletRequest request, HttpServletResponse response) throws ServletException, IOException { request.getRequestDispatcher("cart.jsp").forward(request, response); } private void removeFromCart(HttpServletRequest request, HttpServletResponse response) throws IOException { int productId = Integer.parseInt(request.getParameter("id")); HttpSession session = request.getSession(); List<Product> cart = (List<Product>) session.getAttribute("cart"); if (cart != null) { cart.removeIf(p -> p.getId() == productId); } response.sendRedirect(request.getContextPath() + "/cart?action=view"); } }
第四步:编写前端页面 (JSP)
在 src/main/webapp 目录下创建 JSP 文件。
-
index.jsp(首页)<%@ page contentType="text/html; charset=UTF-8" pageEncoding="UTF-8"%> <!DOCTYPE html> <html> <head> <meta charset="UTF-8"> <title>我的购物网站 - 首页</title> <style> body { font-family: Arial, sans-serif; margin: 20px; } .header { background-color: #f2f2f2; padding: 10px; text-align: center; } .product-list { display: flex; flex-wrap: wrap; gap: 20px; } .product-card { border: 1px solid #ddd; padding: 15px; width: 250px; text-align: center; } .product-card img { max-width: 100%; height: 150px; object-fit: cover; } .product-card h3 { margin: 10px 0; } .product-card p { color: #888; } .product-card a { display: inline-block; margin-top: 10px; text-decoration: none; color: #007bff; } </style> </head> <body> <div class="header"> <h1>我的购物网站</h1> <a href="cart">查看购物车</a> </div> <div class="product-list"> <!-- 商品列表将由 ProductServlet 填充 --> <c:forEach var="product" items="${productList}"> <div class="product-card"> <img src="${product.imageUrl}" alt="${product.name}"> <h3>${product.name}</h3> <p>¥ ${product.price}</p> <a href="products?action=view&id=${product.id}">查看详情</a> </div> </c:forEach> </div> </body> </html> -
product-detail.jsp(商品详情页)<%@ page contentType="text/html; charset=UTF-8" pageEncoding="UTF-8"%> <%@ taglib uri="http://java.sun.com/jsp/jstl/core" prefix="c" %> <!DOCTYPE html> <html> <head> <meta charset="UTF-8"> <title>${product.name} - 商品详情</title> <style> body { font-family: Arial, sans-serif; margin: 20px; } .product-detail { display: flex; gap: 30px; max-width: 800px; margin: auto; } .product-image img { max-width: 400px; } .product-info h2 { margin-top: 0; } .product-info p { margin: 10px 0; } .add-to-cart-btn { display: inline-block; background-color: #28a745; color: white; padding: 10px 20px; text-decoration: none; border-radius: 5px; } .back-link { display: block; margin-top: 20px; } </style> </head> <body> <c:if test="${empty product}"> <p>商品不存在!</p> <a href="products">返回商品列表</a> </c:if> <c:if test="${not empty product}"> <div class="product-detail"> <div class="product-image"> <img src="${product.imageUrl}" alt="${product.name}"> </div> <div class="product-info"> <h2>${product.name}</h2> <p><strong>价格:</strong> ¥ ${product.price}</p> <p><strong>描述:</strong> ${product.description}</p> <a href="cart?action=add&id=${product.id}" class="add-to-cart-btn">加入购物车</a> <a href="products" class="back-link">返回商品列表</a> </div> </div> </c:if> </body> </html> -
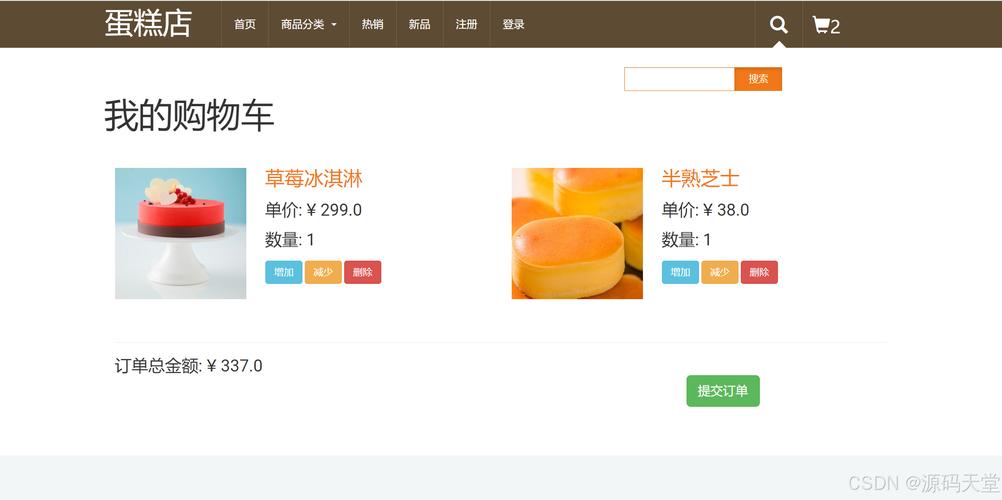
cart.jsp(购物车页面)<%@ page contentType="text/html; charset=UTF-8" pageEncoding="UTF-8"%> <%@ taglib uri="http://java.sun.com/jsp/jstl/core" prefix="c" %> <%@ taglib uri="http://java.sun.com/jsp/jstl/fmt" prefix="fmt" %> <!DOCTYPE html> <html> <head> <meta charset="UTF-8"> <title>我的购物车</title> <style> body { font-family: Arial, sans-serif; margin: 20px; } .cart-header { display: flex; justify-content: space-between; border-bottom: 2px solid #333; padding-bottom: 10px; } .cart-item { display: flex; justify-content: space-between; align-items: center; border-bottom: 1px solid #ddd; padding: 15px 0; } .cart-item img { width: 80px; height: 80px; object-fit: cover; margin-right: 20px; } .item-details { flex-grow: 1; } .item-name { font-weight: bold; } .item-price { color: #888; } .item-actions a { text-decoration: none; color: #dc3545; margin-left: 10px; } .empty-cart { text-align: center; padding: 50px; color: #888; } .checkout-btn { display: block; width: 150px; margin: 20px auto; background-color: #007bff; color: white; padding: 10px; text-align: center; text-decoration: none; border-radius: 5px; } </style> </head> <body> <h1>我的购物车</h1> <a href="products">继续购物</a> <c:choose> <c:when test="${empty cart}"> <div class="empty-cart"> <p>您的购物车是空的!</p> </div> </c:when> <c:otherwise> <div class="cart-header"> <div>商品</div> <div>价格</div> <div>操作</div> </div> <c:forEach var="item" items="${cart}"> <div class="cart-item"> <div class="item-details"> <div class="item-name">${item.name}</div> <div class="item-price">¥ <fmt:formatNumber value="${item.price}" pattern="0.00" /></div> </div> <div>¥ <fmt:formatNumber value="${item.price}" pattern="0.00" /></div> <div class="item-actions"> <a href="cart?action=remove&id=${item.id}">删除</a> </div> </div> </c:forEach> <a href="checkout" class="checkout-btn">去结账</a> </c:otherwise> </c:choose> </body> </html> -
checkout.jsp(结账页面)<%@ page contentType="text/html; charset=UTF-8" pageEncoding="UTF-8"%> <%@ taglib uri="http://java.sun.com/jsp/jstl/core" prefix="c" %> <%@ taglib uri="http://java.sun.com/jsp/jstl/fmt" prefix="fmt" %> <!DOCTYPE html> <html> <head> <meta charset="UTF-8"> <title>结账</title> <style> body { font-family: Arial, sans-serif; margin: 20px; } .checkout-form { max-width: 500px; margin: auto; border: 1px solid #ddd; padding: 20px; } .form-group { margin-bottom: 15px; } .form-group label { display: block; margin-bottom: 5px; } .form-group input { width: 100%; padding: 8px; box-sizing: border-box; } .submit-btn { width: 100%; background-color: #28a745; color: white; padding: 10px; border: none; cursor: pointer; font-size: 16px; } .cart-summary { margin-top: 20px; text-align: right; } .total-price { font-size: 1.5em; font-weight: bold; } </style> </head> <body> <h1>订单结算</h1> <a href="cart">返回购物车</a> <div class="checkout-form"> <form action="order-confirmation" method="post"> <div class="form-group"> <label for="name">收货人姓名:</label> <input type="text" id="name" name="name" required> </div> <div class="form-group"> <label for="address">收货地址:</label> <input type="text" id="address" name="address" required> </div> <div class="form-group"> <label for="card">信用卡号:</label> <input type="text" id="card" name="card" required> </div> <button type="submit" class="submit-btn">确认下单</button> </form> </div> <div class="cart-summary"> <p>订单总金额: <span class="total-price">¥ <fmt:formatNumber value="${totalPrice}" pattern="0.00" /></span></p> </div> </body> </html>
第五步:部署和运行
-
配置 Tomcat 服务器:
- 在 Eclipse 中,点击
Window->Show View->Servers。 - 在 "Servers" 视图中,右键点击 ->
New->Server。 - 选择一个 Apache Tomcat 版本(v9.0),点击
Next。 - 在 "Choose configuration" 步骤,选择 "Create a new configuration"。
- 在 "Select the web project to add" 步骤,勾选你的
shopping-web项目。 - 点击
Finish,Eclipse 会将你的项目部署到 Tomcat 服务器上。
- 在 Eclipse 中,点击
-
启动服务器:
- 在 "Servers" 视图中,右键点击你刚刚创建的 Tomcat 服务器 ->
Start。 - Eclipse 会启动 Tomcat,并编译部署你的 Web 应用。
- 在 "Servers" 视图中,右键点击你刚刚创建的 Tomcat 服务器 ->
-
访问购物网站:
- Tomcat 启动后,会在 Eclipse 的 "Console" 视图中显示日志。
- 打开你的网页浏览器,访问地址:
http://localhost:8080/shopping-web/ - 你现在应该能看到你的购物网站首页了!你可以点击商品查看详情,将商品加入购物车,并查看购物车内容。
总结与扩展
恭喜!你已经使用 Eclipse 成功创建了一个功能完整的、基于 Java Web 技术的购物网页。
这个项目涵盖了:
- Maven 项目结构管理。
- Servlet 作为控制器,处理 HTTP 请求。
- JSP 作为视图,展示动态内容。
- JDBC 与 H2 数据库交互,实现数据持久化。
- HttpSession 实现了客户端的购物车功能。
- 基础的 CSS 美化了页面。
如何进一步扩展这个项目?
- 改进购物车:使用
Map结构来存储购物车,以productId为键,可以方便地修改商品数量。 - 用户系统:增加用户注册、登录功能,需要创建
users表和相关的UserServlet。 - 订单系统:创建
orders和order_items表,在结账时生成订单。 - 前端框架:使用 Bootstrap 或 Vue.js/React 来美化界面,提升用户体验。
- 连接真实数据库:将 H2 数据库替换为 MySQL 或 PostgreSQL。
- 使用更现代的框架:学习并使用 Spring Boot 或 Jakarta EE (如 Jakarta MVC) 来重构项目,它们能大大简化开发流程。


