下面我将为你提供一个从零到一的、详细且循序渐进的 WordPress 模板制作指南。
第一部分:核心概念与准备工作
在开始编码之前,你需要了解几个核心概念。
WordPress 主题的基本结构
一个 WordPress 主题主要由以下几部分组成:
style.css: 主题的“身份证”,这个文件包含了主题的所有元信息,比如主题名称、作者、描述、版本等,WordPress 正是通过这个文件来识别和激活一个主题。index.php: 主题的“主心骨”,如果其他模板文件不存在,WordPress 会默认调用这个文件来显示页面,它通常包含了网站的基本布局结构(如头部、内容区、底部)。header.php: 网站的“头部”,包含了<head>标签(引入 CSS、JS、Meta 信息等)和网站顶部的导航菜单、Logo 等内容。footer.php: 网站的“底部”,包含了页面底部的版权信息、友情链接、脚本引用等。functions.php: 主题的“功能库”,这是一个特殊的 PHP 文件,用来添加主题所需的功能,比如注册菜单、添加特色图片、引入脚本和样式等。sidebar.php: 网站的“侧边栏”,通常包含小工具(Widgets)区域。- 模板文件: 其他根据不同页面类型命名的文件,
single.php: 用于显示单篇文章。page.php: 用于显示“页面”(Page)。archive.php: 用于显示文章列表(归档、分类、标签等)。search.php: 用于显示搜索结果。php: 当页面找不到时显示的“404 错误”页面。
准备工作
-
本地开发环境:
- 强烈建议在你的电脑上搭建一个本地服务器环境,这样你可以随时测试而无需上传到远程服务器。
- 推荐工具:
XAMPP(Windows/Mac/Linux),MAMP(Mac), 或Local(by Flywheel, 跨平台)。
-
代码编辑器:
 (图片来源网络,侵删)
- 你需要一个能高亮显示 PHP、HTML、CSS、JavaScript 的编辑器。
- 推荐工具:
Visual Studio Code(免费且强大),Sublime Text,PhpStorm。
-
文件结构:
- 在你的 WordPress 安装目录下的
wp-content/themes/文件夹里,创建一个新的文件夹来存放你的主题,文件夹名称最好使用小写字母和连字符,my-first-theme。
- 在你的 WordPress 安装目录下的
第二部分:分步制作流程
我们将创建一个非常简单的主题,包含最基本的布局和功能。
步骤 1:创建 style.css 并定义主题
在你的主题文件夹 my-first-theme 中,创建一个名为 style.css 的文件,并填入以下内容,这是最关键的一步。
/*
Theme Name: My First Theme
Theme URI: https://example.com/
Author: Your Name
Author URI: https://example.com/
Description: A simple and clean theme for learning WordPress.
Version: 1.0
License: GNU General Public License v2 or later
License URI: http://www.gnu.org/licenses/gpl-2.0.html
Text Domain: myfirsttheme
*/
保存后,登录你的 WordPress 后台,进入“外观” -> “主题”,你应该能看到你的新主题“My First Theme”了,可以点击“启用”。
步骤 2:创建 header.php
这个文件定义了网站的头部,在 my-first-theme 文件夹中创建 header.php如下:
<!DOCTYPE html>
<html <?php language_attributes(); ?>>
<head>
    <meta charset="<?php bloginfo( 'charset' ); ?>">
    <meta name="viewport" content="width=device-width, initial-scale=1">
    <?php wp_head(); ?>
</head>
<body <?php body_class(); ?>>
<div id="page" class="site">
    <a class="skip-link screen-reader-text" href="#content"><?php _e( 'Skip to content', 'myfirsttheme' ); ?></a>
    <header id="masthead" class="site-header">
        <div class="site-branding">
            <?php
            if ( has_custom_logo() ) :
                the_custom_logo();
            else :
                ?>
                <h1 class="site-title"><a href="<?php echo esc_url( home_url( '/' ) ); ?>" rel="home"><?php bloginfo( 'name' ); ?></a></h1>
                <p class="site-description"><?php bloginfo( 'description' ); ?></p>
            <?php endif; ?>
        </div><!-- .site-branding -->
        <nav id="site-navigation" class="main-navigation">
            <?php
            wp_nav_menu(
                array(
                    'theme_location' => 'primary',
                    'menu_id'        => 'primary-menu',
                )
            );
            ?>
        </nav><!-- #site-navigation -->
    </header><!-- #masthead -->
解释:
<?php language_attributes(); ?>: 输出语言属性,如lang="zh-CN"。<?php bloginfo( 'charset' ); ?>: 输出网站字符集,通常是UTF-8。<?php wp_head(); ?>: 极其重要! WordPress 会在这里插入许多必要的链接和脚本(如插件、WordPress 核心文件)。永远不要忘记它!<?php body_class(); ?>: 为<body>标签添加一些有用的 CSS 类,方便样式定制。wp_nav_menu(): 调用 WordPress 的导航菜单功能,我们稍后在functions.php中注册这个菜单。
步骤 3:创建 footer.php
在 my-first-theme 文件夹中创建 footer.php如下:
<footer id="colophon" class="site-footer">
<div class="site-info">
© <?php echo date('Y'); ?> <?php bloginfo('name'); ?>. All Rights Reserved.
</div><!-- .site-info -->
</footer><!-- #colophon -->
</div><!-- #page -->
<?php wp_footer(); ?>
</body>
</html>
解释:
<?php wp_footer(); ?>: 和wp_head()同样重要! WordPress 会在这里插入页脚脚本(如统计代码等)。永远不要忘记它!
步骤 4:创建 index.php - 主循环
这是主题的核心,它决定了网站首页的内容布局,在 my-first-theme 文件夹中创建 index.php如下:
<?php get_header(); ?>
<div id="primary" class="content-area">
    <main id="main" class="site-main">
    <?php if ( have_posts() ) : ?>
        <?php
        /* Start the Loop */
        while ( have_posts() ) : the_post();
            /*
             * Include the Post-Format-specific template for the content.
             * If you want to override this in a child theme, then include a file
             * called content-___.php (where ___ is the Post Format name) and that will be used instead.
             */
            get_template_part( 'template-parts/content', get_post_format() );
        endwhile;
        the_posts_navigation();
    else :
        get_template_part( 'template-parts/content', 'none' );
    endif; ?>
    </main><!-- #main -->
</div><!-- #primary -->
<?php get_sidebar(); ?>
<?php get_footer(); ?>
解释:
<?php get_header(); ?>: 引入header.php文件。<?php get_footer(); ?>: 引入footer.php文件。<?php get_sidebar(); ?>: 引入sidebar.php文件(我们稍后会创建)。- 主循环:
if ( have_posts() ) : ... while ( have_posts() ) : the_post(); ... endwhile; endif;是 WordPress 的核心,它会遍历所有要显示的文章。 get_template_part(): 这是一个非常推荐使用的函数,用于引入可复用的模板片段,我们在这里引入一个content.php文件来显示单篇文章的内容。
步骤 5:创建内容模板 content.php
为了代码清晰,我们创建一个专门的文件来显示文章内容,在 my-first-theme 文件夹下创建 template-parts/content.php 文件。
<article id="post-<?php the_ID(); ?>" <?php post_class(); ?>>
    <header class="entry-header">
        <?php
        if ( is_singular() ) :
            the_title( '<h1 class="entry-title">', '</h1>' );
        else :
            the_title( '<h2 class="entry-title"><a href="' . esc_url( get_permalink() ) . '" rel="bookmark">', '</a></h2>' );
        endif;
        ?>
    </header><!-- .entry-header -->
    <div class="entry-content">
        <?php
        the_content(
            sprintf(
                wp_kses(
                    /* translators: %s: Name of current post. */
                    __( 'Continue reading<span class="screen-reader-text"> "%s"</span>', 'myfirsttheme' ),
                    array(
                        'span' => array(
                            'class' => array(),
                        ),
                    )
                ),
                get_the_title()
            )
        );
        wp_link_pages(
            array(
                'before' => '<div class="page-links">' . esc_html__( 'Pages:', 'myfirsttheme' ),
                'after'  => '</div>',
            )
        );
        ?>
    </div><!-- .entry-content -->
    <footer class="entry-footer">
        <?php myfirsttheme_entry_footer(); ?>
    </footer><!-- .entry-footer -->
</article><!-- #post-<?php the_ID(); ?> -->
解释:
the_ID(): 输出文章的唯一 ID。post_class(): 为文章元素添加 CSS 类。the_title(): 输出文章标题。is_singular(): 判断当前是否是单个文章或页面,决定标题是否添加链接。the_content(): 输出文章的完整内容。
步骤 6:创建 sidebar.php 和 functions.php 来启用侧边栏和菜单
现在我们需要让 WordPress 知道我们的菜单和侧边栏。
-
创建
sidebar.php: 在my-first-theme文件夹中创建sidebar.php:<aside id="secondary" class="widget-area"> <?php dynamic_sidebar( 'sidebar-1' ); ?> </aside><!-- #secondary --> -
创建
functions.php- 添加功能: 这是主题的“大脑”,在my-first-theme文件夹中创建functions.php,并添加以下代码:<?php /** * My First Theme functions and definitions. * * @link https://developer.wordpress.org/themes/basics/theme-functions/ * * @package My_First_Theme */ // 1. 设置主题支持和内容宽度 function myfirsttheme_setup() { // Add default posts and comments RSS feed links to head. add_theme_support( 'automatic-feed-links' ); // Let WordPress manage the document title. add_theme_support( 'title-tag' ); // Enable support for Post Thumbnails on posts and pages. add_theme_support( 'post-thumbnails' ); // Register a new navigation menu. register_nav_menus( array( 'primary' => __( 'Primary Menu', 'myfirsttheme' ), ) ); // Switch default core markup for search form, comment form, and comments to output valid HTML5. add_theme_support( 'html5', array( 'search-form', 'comment-form', 'comment-list', 'gallery', 'caption', ) ); } add_action( 'after_setup_theme', 'myfirsttheme_setup' ); // 2. 注册侧边栏 function myfirsttheme_widgets_init() { register_sidebar( array( 'name' => __( 'Sidebar', 'myfirsttheme' ), 'id' => 'sidebar-1', 'description' => __( 'Add widgets here to appear in your sidebar.', 'myfirsttheme' ), 'before_widget' => '<section id="%1$s" class="widget %2$s">', 'after_widget' => '</section>', 'before_title' => '<h2 class="widget-title">', 'after_title' => '</h2>', ) ); } add_action( 'widgets_init', 'myfirsttheme_widgets_init' ); // 3. 引入 CSS 和 JavaScript 文件 function myfirsttheme_scripts() { // 引入 style.css wp_enqueue_style( 'myfirsttheme-style', get_stylesheet_uri() ); // 引入一个自定义的 JS 文件 (如果需要) // wp_enqueue_script( 'myfirsttheme-navigation', get_template_directory_uri() . '/js/navigation.js', array(), '20251215', true ); } add_action( 'wp_enqueue_scripts', 'myfirsttheme_scripts' ); // 4. 在 content.php 中调用的函数 function myfirsttheme_entry_footer() { // Hide category and tag text for pages. if ( 'post' === get_post_type() ) { /* translators: used between list items, there is a space after the comma */ $categories_list = get_the_category_list( esc_html__( ', ', 'myfirsttheme' ) ); if ( $categories_list && myfirsttheme_categorized_blog() ) { /* translators: 1: category list. */ printf( '<span class="cat-links">' . esc_html__( 'Posted in %1$s', 'myfirsttheme' ) . '</span>', $categories_list ); // phpcs:ignore WordPress.Security.EscapeOutput.OutputNotEscaped } /* translators: used between list items, there is a space after the comma */ $tags_list = get_the_tag_list( '', esc_html__( ', ', 'myfirsttheme' ) ); if ( $tags_list ) { /* translators: 1: tag list. */ printf( '<span class="tags-links">' . esc_html__( 'Tagged %1$s', 'myfirsttheme' ) . '</span>', $tags_list ); // phpcs:ignore WordPress.Security.EscapeOutput.OutputNotEscaped } } edit_post_link( sprintf( wp_kses( /* translators: %s: Name of current post. Only visible to screen readers */ __( 'Edit <span class="screen-reader-text">%s</span>', 'myfirsttheme' ), array( 'span' => array( 'class' => array(), ), ) ), get_the_title() ), '<span class="edit-link">', '</span>' ); }
步骤 7:添加基本样式
打开 style.css 文件,在主题信息注释下方添加一些基本样式,让主题看起来不那么“素颜”。
/* 文件路径: /wp-content/themes/my-first-theme/style.css */
/* 主题信息注释... (省略) */
/* 基本样式重置和布局 */
body {
    font-family: -apple-system, BlinkMacSystemFont, "Segoe UI", Roboto, Oxygen-Sans, Ubuntu, Cantarell, "Helvetica Neue", sans-serif;
    line-height: 1.6;
    margin: 0;
    padding: 0;
    color: #333;
    background-color: #fff;
}
.site-header {
    background-color: #0073aa;
    color: #fff;
    padding: 1rem 0;
}
.site-branding a {
    color: #fff;
    text-decoration: none;
}
.site-title {
    margin: 0;
    font-size: 2rem;
}
.main-navigation ul {
    list-style: none;
    margin: 0;
    padding: 0;
    display: flex;
}
.main-navigation li {
    margin-left: 1rem;
}
.main-navigation a {
    color: #fff;
    text-decoration: none;
    display: block;
    padding: 0.5rem 1rem;
}
.content-area {
    padding: 2rem;
    max-width: 1200px;
    margin: 0 auto;
}
.site-main article {
    margin-bottom: 2rem;
    padding-bottom: 2rem;
    border-bottom: 1px solid #eee;
}
.entry-title a {
    color: #333;
    text-decoration: none;
}
.entry-meta {
    font-size: 0.8rem;
    color: #777;
}
/* 响应式设计 */
@media screen and (max-width: 600px) {
    .content-area {
        padding: 1rem;
    }
}
第三部分:测试与进阶
测试你的主题
- 确保你的本地服务器正在运行。
- 在 WordPress 后台,进入“外观” -> “主题”,激活你的“My First Theme”。
- 去首页看看效果,你应该能看到你的网站布局了。
- 前往“外观” -> “菜单”,创建一个菜单并分配给“主菜单”位置。
- 前往“外观” -> “小工具”,为“侧边栏”添加一些小工具,分类目录”或“文章归档”。
- 写几篇文章,看看文章列表和单篇文章页面是否正常显示。
进阶学习方向
当你掌握了这个基本流程后,可以探索更高级的主题开发技术:
- 子主题: 创建一个父主题的子主题,用于修改父主题而不会丢失更新,这是最佳实践。
- 模板层次结构: 深入理解 WordPress 如何选择不同的模板文件来显示不同页面,创建一个
front-page.php来制作一个独特的首页。 - WordPress REST API: 学习如何使用 JavaScript 和 React/Vue 等前端框架来构建“无头 WordPress”网站。
- 区块编辑器 支持: 学习如何为你的主题添加区块编辑器样式和模板,让用户可以更自由地拖拽编辑页面。
- 安全与性能: 学习如何编写安全的代码(如数据转义
esc_html(),esc_url()),以及如何优化主题性能(如合并压缩 CSS/JS)。
推荐资源
- 官方文档: Theme Developer Handbook - 这是最好的学习资源,没有之一。
- 在线教程: Smashing Magazine, CSS-Tricks, YouTube 上的 "WordPress Theme Development" 教程。
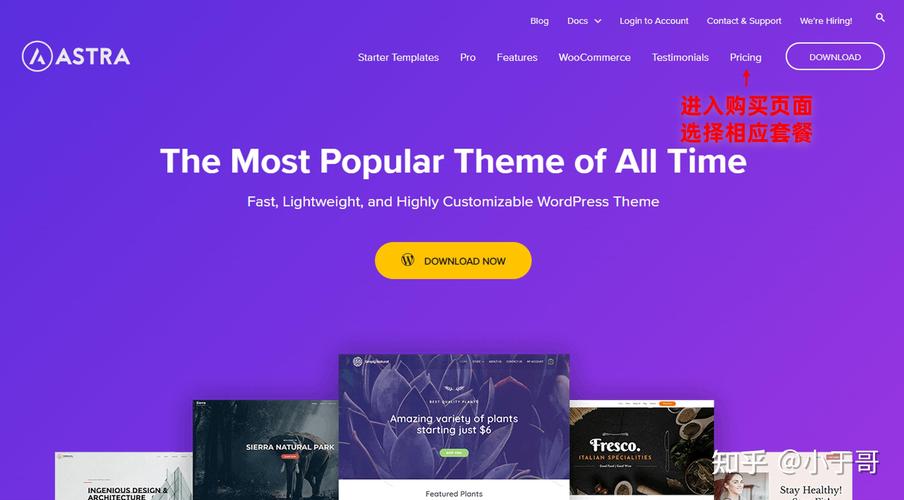
- 代码查看: 下载并研究一些优秀的开源主题,如
Underscores(https://underscores.me/),它是一个由 WordPress 官方提供的、用于快速启动主题开发的骨架模板。
制作模板是一个不断学习和实践的过程,祝你编码愉快!


